Monday 24 February 2014

Couture Creations Design Team Application Round 2

I can hardly believe it, but I have made it through to Round 2 of the DT call for Couture Creations! This round required participants to create a new project using Couture Creations embossing folders and dies, with an optional bonus requirement to use Core'dinations Cardstock too. 

I have taken the opportunity to create a motivational canvas to go up in my new craft room.


Because Couture Creations have fantastic step-by-step tutorials on their blog and in their Creative Inspiration Magazine part of this round is also to create a walk through of the project's creation.

Prepare the Background
1/ If necessary, prepare your canvas by giving it a coating of gesso. Lots of canvases now come pre-primed so you might be able to skip this step.
2/ Paint the canvas. This is an optional step and depends on your end plans. I chose to paint mine because I'm a bit haphazard when it comes to layering my background paper and I don't white spots showing through. I think it also gives a more finished look to have a painted edge to the canvas. 
3/ Cover your canvas in scraps of paper. It's up to you whether you want to cover the while thing or just cover sections of it. I like the effect of having the rough torn edges showing through and a bit of a haphazard design.
4/ Create a gesso wash by mixing gesso and water, then cover the whole canvas with this. I have found it's better to make a more watery wash as you can always build up successive layers if you decide you want a whiter finish but it can be hard to dilute down once the paint in on your paper if you start too thick. This wash also helps seal all the paper to your canvas.
Put the canvas aside to dry.


Making the Doll
5/ Sketch out your paper doll shape. I have only drawn the left side of mine along a folded piece of paper because I like to have symmetrical dolls, this is up to you of course. The legs have been done as a seperate piece so I can change the height of the doll and also to add the paper lace under the skirt.
6/ Cut out the relevant sections of the doll to paper piece your doll together. As you can see, I slowly cut my paper model down to suit each section I need.
7/ This is the section where the magic happens! I have used the fantastic Core'dinations Cardstock for the dress, which is black on top with a coloured core and underside. I ran it through the Trellis embossing folder to give it a beautiful floral pattern, which is then further brought out by lightly rubbing the paper with a sanding block. Make sure you think carefully about the way you put your paper into the embossing folder so the pattern ends up raised and not debossed, unless that is the effect you're going for of course. I also ran an offcut of the cardstock through with the Blossom Yarn doily die from the Royal Jewels Collection, which I will use as a lace trim to the skirt.
8/ Stick your doll together. Add additional embellishments if you desire. I ended up adding a sparkly bling for a belt buckle after taking this photo.


Decorate the Background
9/ Place your doll and any embellishments/quotes on the layout WITHOUT gluing them down. This is so you can play around with placement until you find one you like and then decorate around those areas. You can see I have also added a couple of extra dollies (Ivy set of die cuts from the Fantastia Collection) cut from dress-pattern paper to the canvas for some added texture too.


10/ Go crazy creating your background! Yes, these is a big difference between the last step and this one but the fun part about creating these backgrounds is that there is no right or wrong approach here so do whatever you feel comfortable. If you don't like it, just add something else over the top. If you want so ideas for what you can do here are the techniques I used:
  • Add some washi tape strips;
  • Apply texture paste thickly in one area, spray an embossing folding with water or GlimmerMist and then press firmly into the paste. I have used the Celebrate folder from the Elegance Collection in the bottom left corner (bottom right close up photo). This technique takes a bit of practice;
  • Gesso over a template or two;
  • Use of couple of different coloured Gelatos around the border and blend this in to the middle;
  • Stamp circles onto the canvas using toilet rolls and bottle lids;
  • Flick mist or watered down paint over the canvas;
  • Stamp an image around the edge of the border. I found the unmounted clear stamps work best as you don't need complete images for this effect.


11/ Glue on all the embellishments to the canvas: doll, quote, flowers, metal trim.


12/ Paint on the hair and you're done! :)


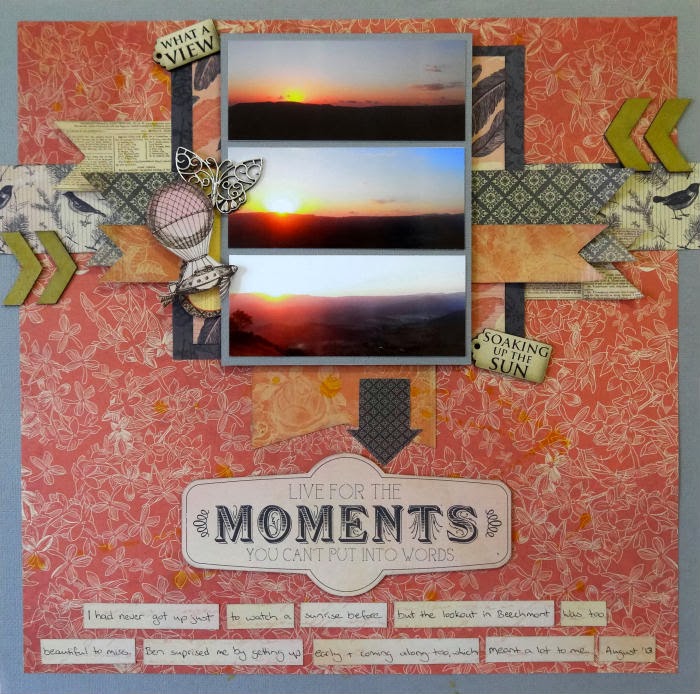
I'll leave you with some close ups of the canvas, including the quote I've used: "Live with purpose, Love with passion, Laugh with pleasure". If this tutorial inspires you to create your own canvas I would love to be able to look at your finished work.


If you're interested in finding out more about Couture Creations products, projects and give aways why not like their page on Facebook?

Thursday 20 February 2014

Live for the Moments - Scrapmatts DT

Page Drafts is having a massive competition this month with a Love is Everywhere theme. I have been checking out their sketches for quite a while but never seemed to get around to creating a LO with them until now. The theme was 'whatever it is that makes your heart skip a beat, scrap about it!'. I have chosen to scrapbook watching the sunrise at Beechmont with my husband. It was an amazing experience, firstly because it was the first time I have intentionally woken up just to watch a sunrise but also because Ben got up with me to go watch it. This from the man who doesn't normally get out of bed until 9.30am on the weekends, let alone when we're away on holidays!


Since this is one of my Scrapmatts DT projects I also wanted to point out I was sent a pack of the mini-tag scrapwords new release and even though the pack is sailing theme, I found these two tags were perfect for my sunset layout. Don't be afraid to think outside the box when using chipboard, sometimes using it for something other than it's intended purpose gives the most amazing results.
Scrapmatts goodies used: CB1218 Scrap Words 19 (NEW); CB5106 Chevrons 01; CH026 Butterflies #7.

There are five different Page Drafts sketches you can chose from. I went with the first one as it was perfect for my photos. One of the competition rules was that you had to stick as closely as possible to the sketch so I haven't deviated too much.


Tuesday 18 February 2014

Valentines Day Card - Scrapmatts DT

I completed the card on time, I'm just very late posting it to share with you. You've probably already seen this one quickly as part of my Couture Creations DT application, it's also one of my Scrapmatts DT pieces for this month. The chipboard heart I have had hanging around for the longest time, after using the main design piece of the heart frame on a LO probably a year ago. I thought the metal arrow charm was just the perfect addition, along with some kindyglitz and glitter for a bit of sparkle.


Ben and I had a lovely relaxed Valentines Day, just going out from brunch and enjoying spending the day together before catching up with some friends for dinner. I hope you enjoyed the day too, however you chose the spend it.

Given the heart is from my stash, I'm going to enter the card into the current Use Your Stuff challenge: #123 Hearts.

Because of the bling in the corners and the glitter on the heart, I'll also enter the card into the Southern Girls Challenge: Bling It.

Sunday 16 February 2014

Couture Creations 2014 Design Team Audition

Couture Creations is an amazing scrapbook company who specialise in decorative dies and embossing folders, as well as lots of hand tools and other accessories. They are currently having a DT call and I figured you have to be in it to win it, so here is my entry.


First up we have a birthday card with an embossed acetate panel. I then filled in the embossed part of the image with orange paint to highlight the design of the beautiful Trellis folder from the Serenity Collection.


This tag uses the Blossom Yarn doily die from the Royal Jewels Collection. I loved this die and it creates a stunning shape but it used to take me so long to clean up all the little holes so I would only use it occasionally. That all changed when I discovered the benefits of Couture Creations ejection foam sheets while at an expo. Using these sheets makes pressing out detailed die cuts a breeze.
 

This tag and card set feature the beautiful Ivy set of die cuts from the Fantastia Collection. Again, they are so quick and easy to create using the ejection foam sheets.


 This Valentines Day card has used a letterpress effect with the Party Time embossing folder, so the ink is applied to the folder itself prior to running the card through the embossing machine. A doily from the Ivy set of die cuts from the Fantastia Collection is the perfect embellishment to ground the card and some Gem Stones give the project a finishing touch.


Lastly, an example of how an embossing folder can perk up an otherwise plain photo mat in a scrapbooking layout.

Scrapmatts New Release Frames

It's my day to post over at Scrapmatts and I have actually created three projects, but I'll be spacing them out on my blog since the poor thing is so bare otherwise. If you're impatient you can check them all out at once over at the new Scrapmatts Blog or at the Ning Gallery.


Sofie and Andrew sent out a wonderful package of new release chipboard designs earlier this year to their design team. Each member gets a slightly different package though, so you never know what all the new releases look like until you see the other DT's work or get in to a show yourself. I have already added the Hanging Hearts to my wish list after seeing how the other members have used it.

I received a lot of different frames in my pack, which was both good and bad. Good because I love Scrapmatts frames and the new releases are even more detailed and delicate than normal but also bad because I am really hopeless at actually using them in my work. This ornate frame design (you get both pieces in the one packet) just spoke to me though so I based these two projects around it. Bit more girly than normal for me, with lots of pink and flowers and lace but I really like the end results.

Scrapmatts goodies used: CB6090 Ornate Frames 18 (NEW); CH004 Filigree Flower #2; CH010 Filigree Flower #5; CB1121 Words 26 Best Wishes; CB3011 Tags 07; CB1204 Ribbon Banners 01; CB1198 Scrapwords 06.

Saturday 8 February 2014

Exciting Baby News!

It's not scrapbooking related but I'm sure it will shortly be a big focus of my scrapbooking. My husband Ben and I are expecting out first child! We are quite excited, as you can imagine. We just had our 12 week scan and everything looks good. Fingers crossed everything continues to go well.

Sunday 2 February 2014

Scrapmatts new blog

Scrapmatts has a Blog! You'll find all the inspiration from the Scrapmatts DT along with challenges, blog hops, give aways (yay!)  and all sorts of fun stuff. You can find the new Blog here. The DT will post their creations to the blog on their allocated days - mine is the 16th of each month. Don't forget the NING site too where the Gallery will be updated by the DT and you can share your Scrapmatts creations with us. Inspiration overload!
 
Scrapmatts